How do we activate meal benefits?
Table of Contents
The Administrator - Meal benefits
You can report meal benefits outside per diem in the service. The service is based on the tax authorities Skatteverket's standard values and reports to our integrated salary recipients. As an administrator, you simply activate meal benefits under expense categories and select meal types and salary types. A meal benefit normally arises as soon as an employee has eaten a meal paid for by the employer.
Activate meal benefits
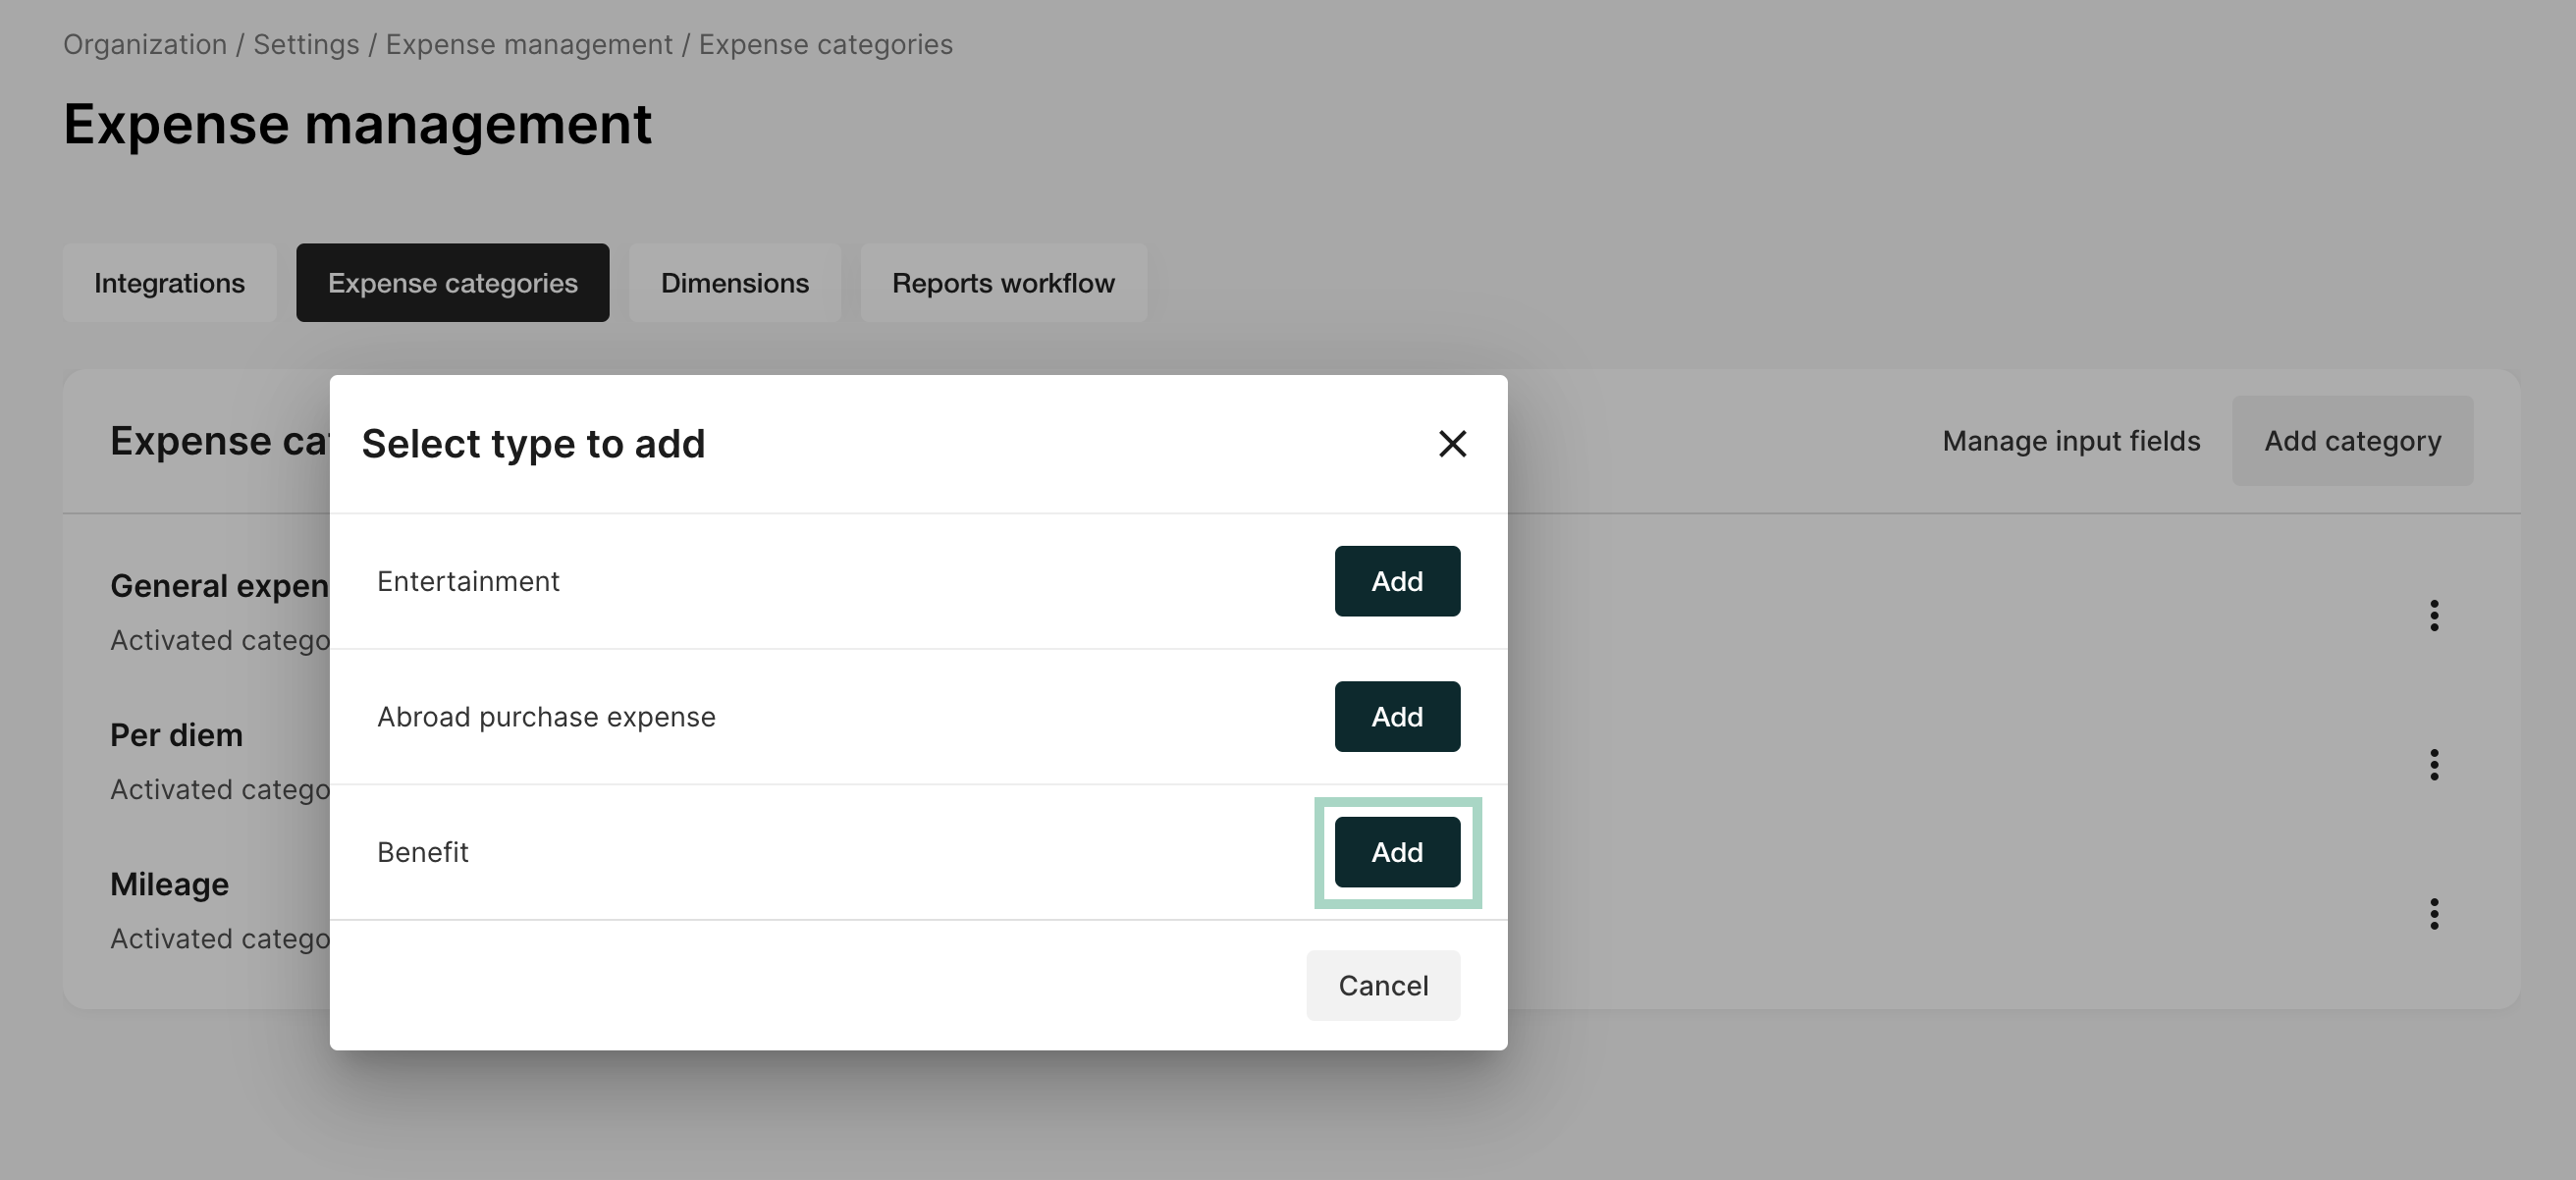
Go to the left-hand side menu in the Organisation mode and go to Settings > Expense management > Expense categories and click Add Category.


Another new window opens and here you select Create new category and Meal benefit.

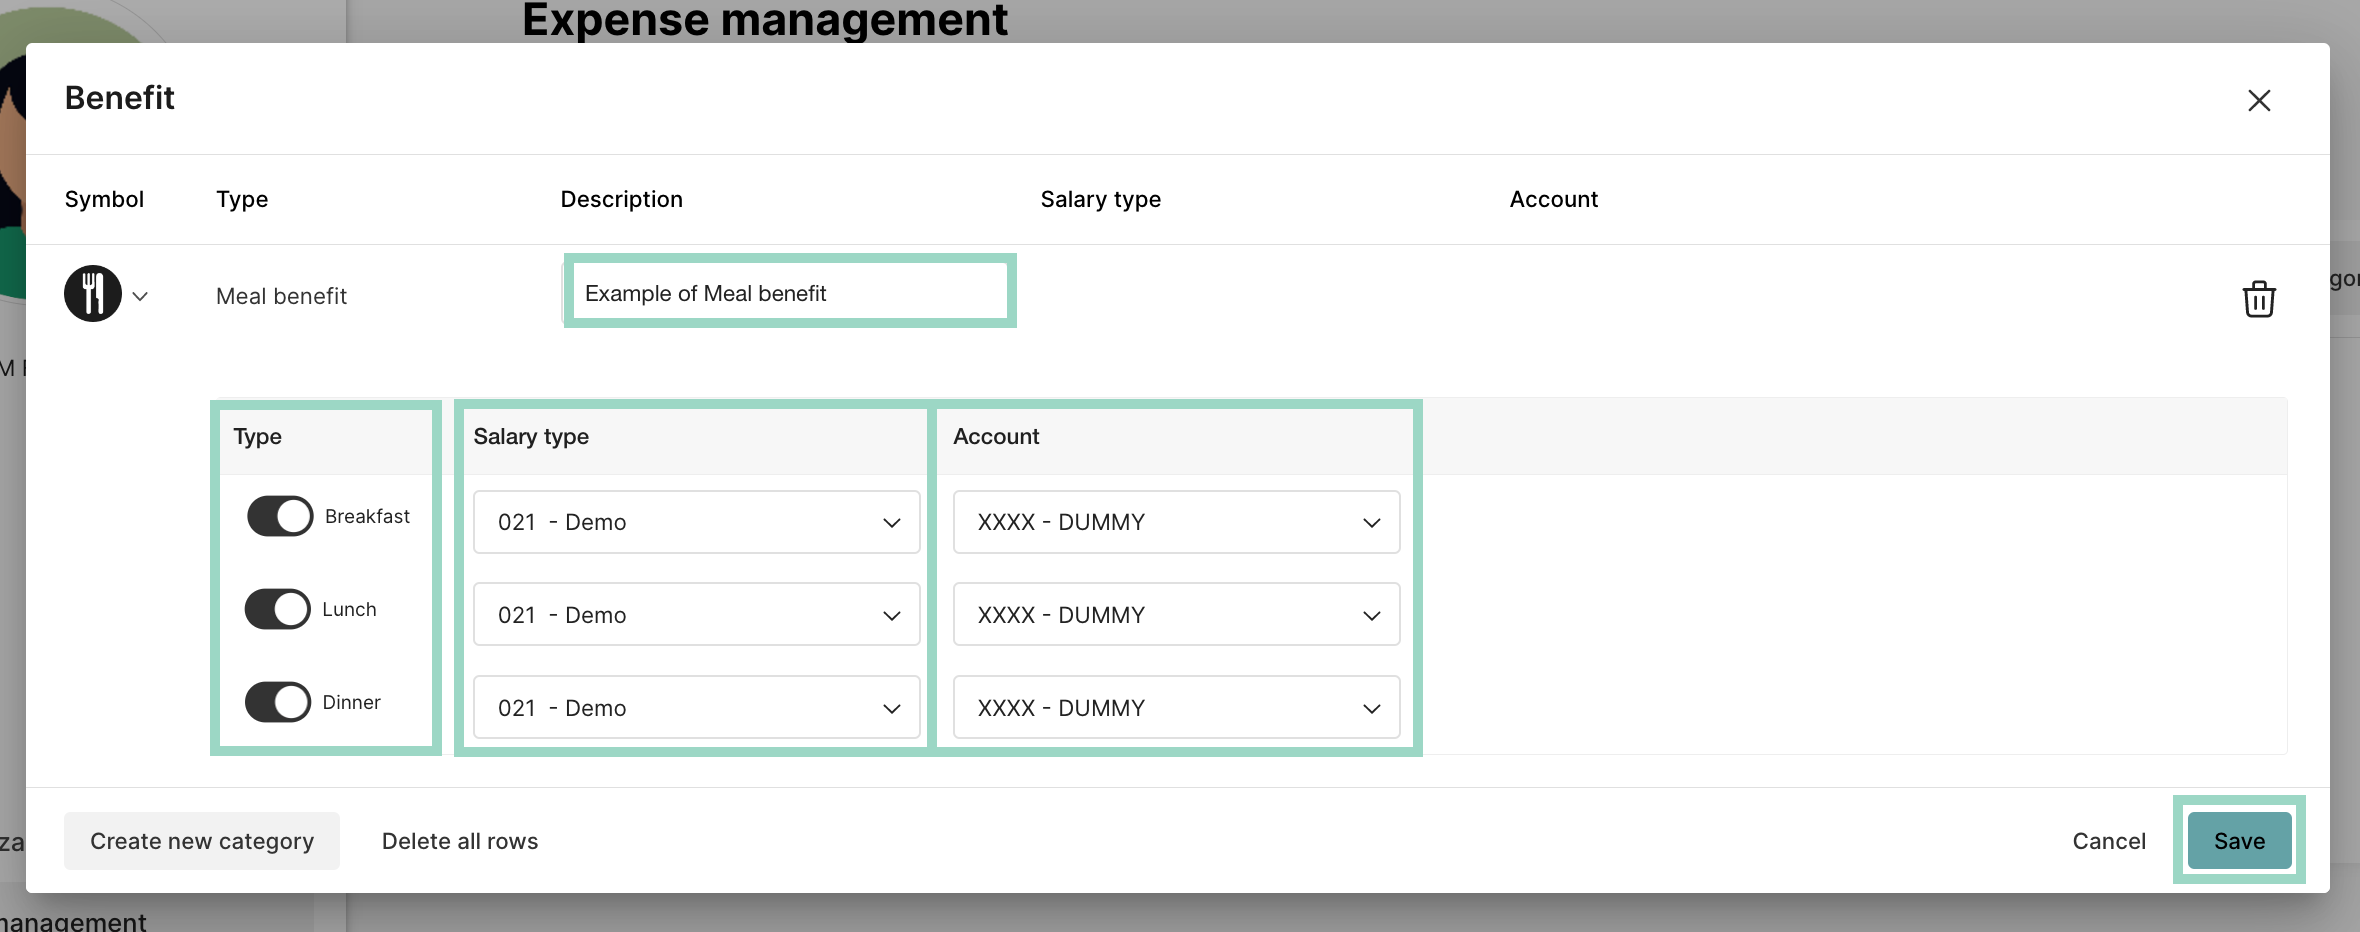
The meal benefit is now added and now it's time to make the settings.
First, choose a description of the meal benefit and turn on the type of meal benefits users should be able to choose from (breakfast, lunch, dinner) by clicking the "on/off switch" next to the type you want to activate.
Then choose which salary type and account (note that even if the meal benefit shouldn't be sent to the accounting, you need to fill in an account here, e.g. a so-called "dummy" account that is not used) that should be linked to the respective benefit.
Save the settings and then you will be able to find the expense category for Benefit under the tab Expense categories.

The user will now see New meal benefit where the options to create new expenses are in Private mode. The user can now fill in which benefit they have received and can then include this in a report.
Finally... Don't forget to set under Settings > Expense management > Integrations to which salary recipient the Food Benefit should be sent.