I want to add an accounting integration, what do I have to think of after adding it?
Table of Contents
This article applies to the following countries
- All countries
In this article, we will go through what is good to keep in mind when adding an accounting integration for the first time, and what settings are needed for an accounting integration to work.
Let's start with adding the integration.
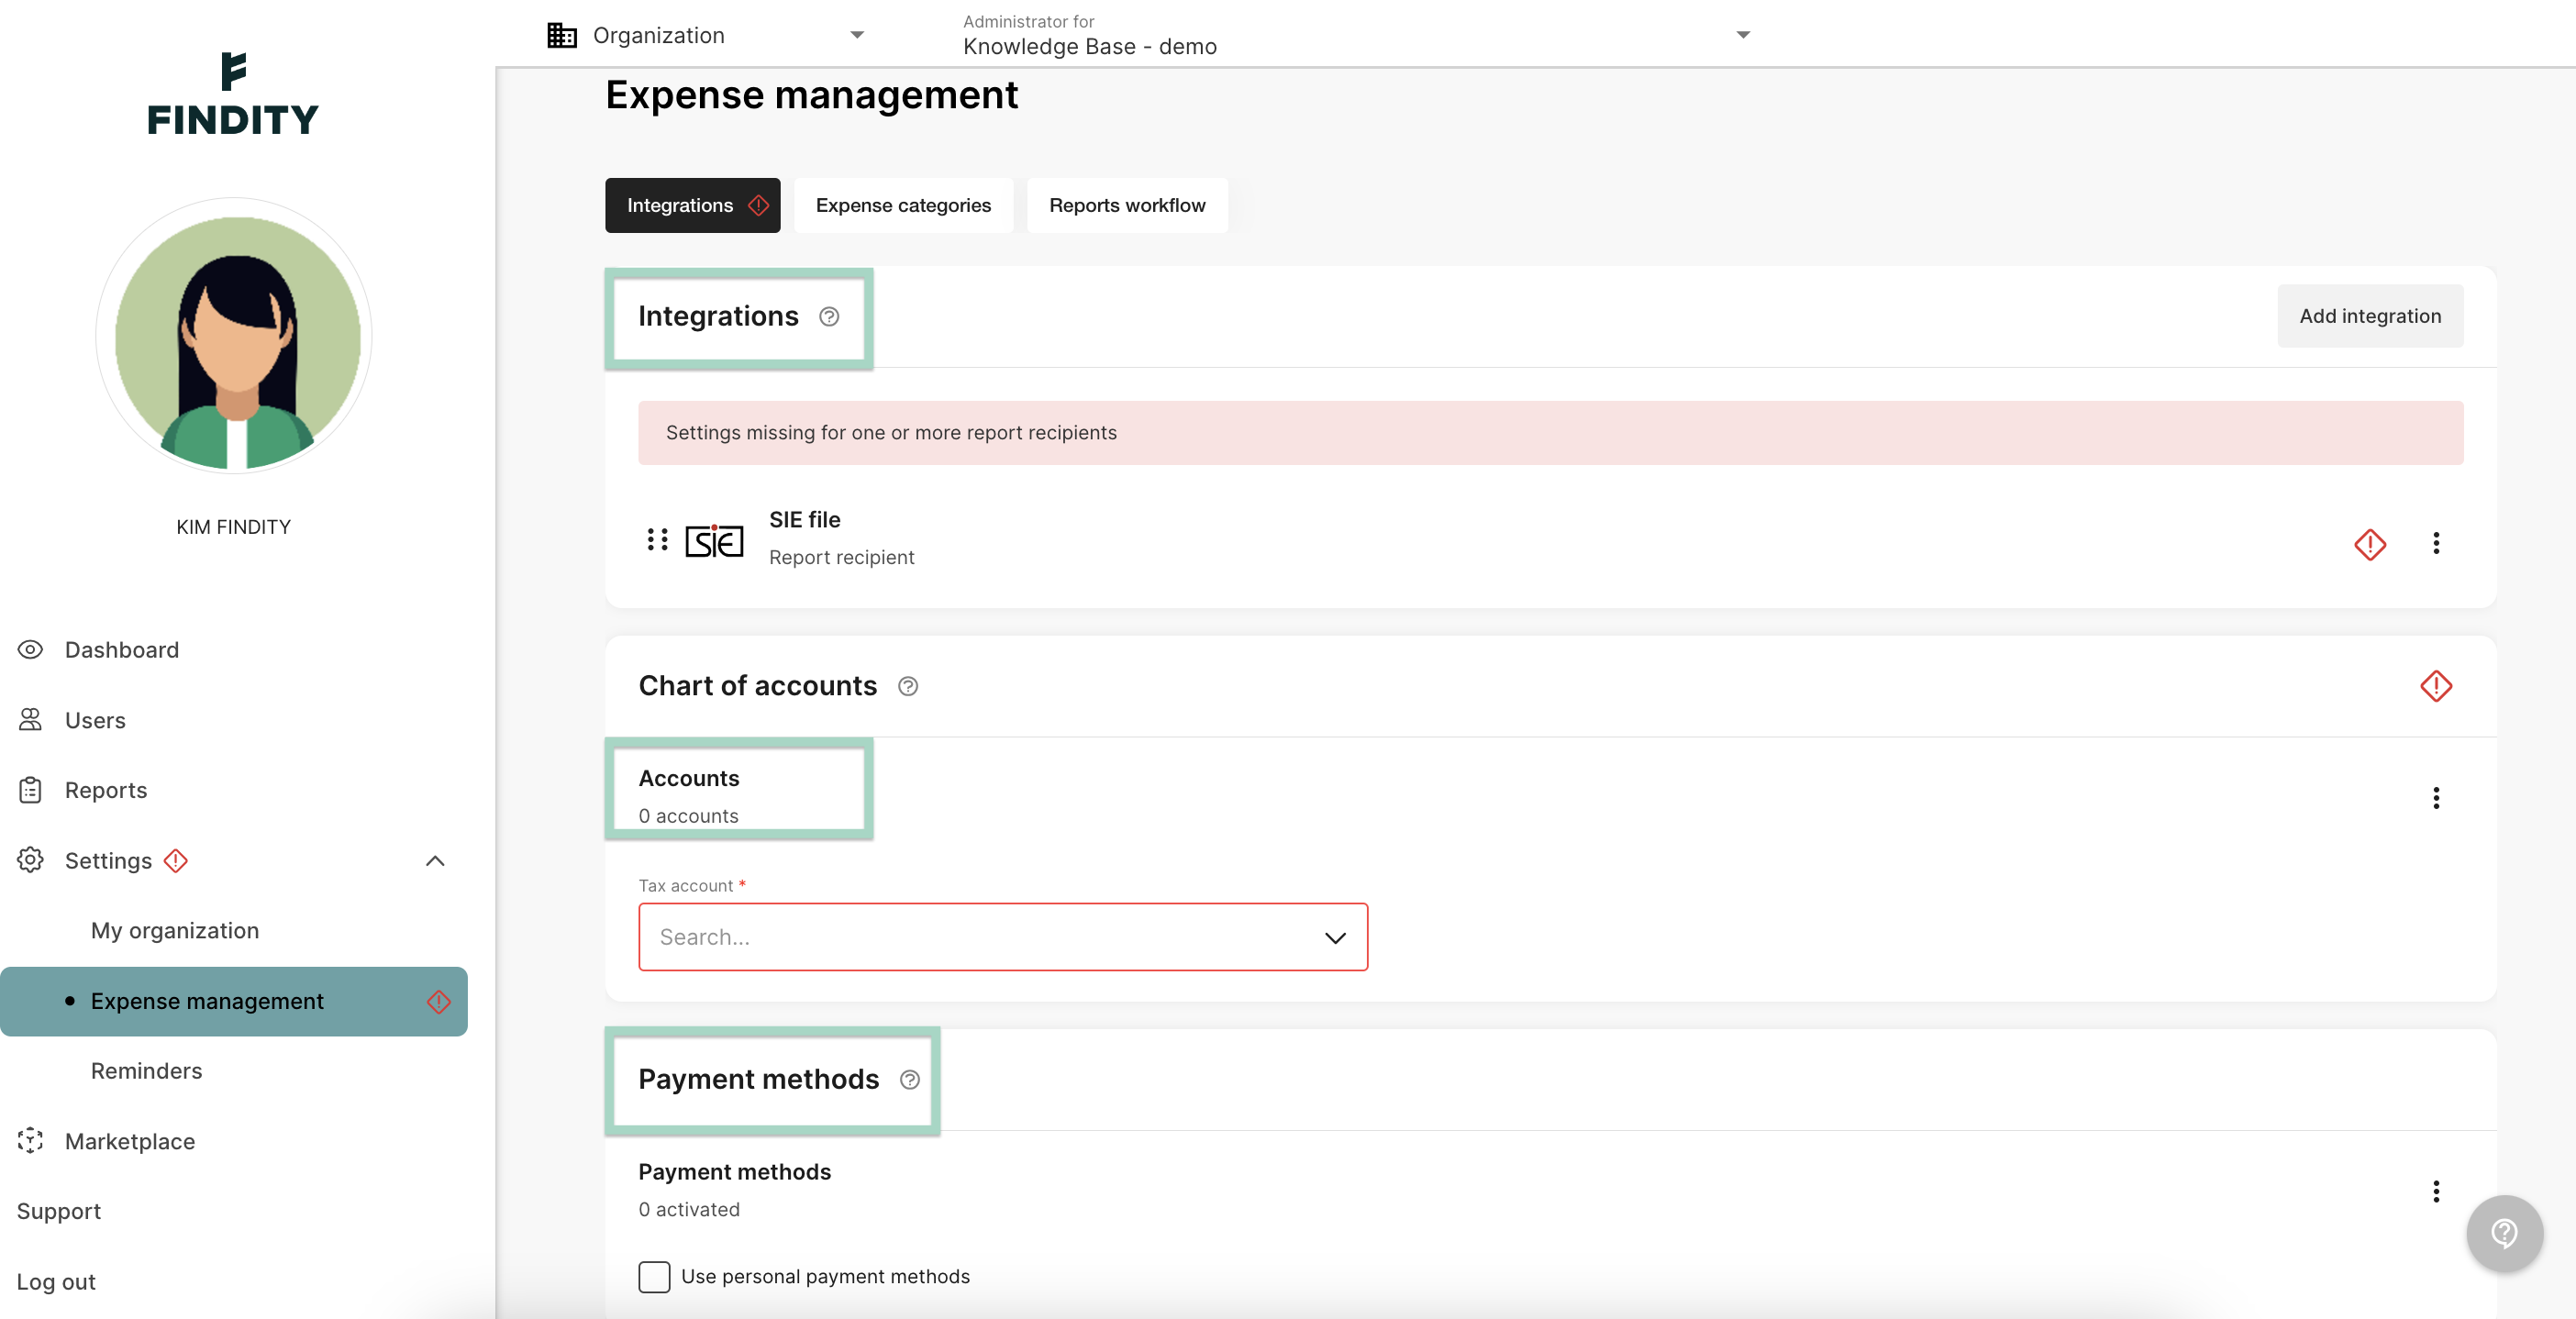
Go to the tab Settings - Expense management - Integrations - Add integration. In this example we added the integration SIE-file.
The red lines on the page indicate settings are missing and need to be added.
Integrations, Accounts and Payment methods are fields you need to go through to add the accounting settings.

Click on the settings below to read more about Integrations, Chart of accounts and Payment methods.
Integrations
We will start in the first box on the page Integrations.
If you want to add several integrations, press Add integration and select the integration you want to add to your organization. Read more in this article Multiple integrations how the system works if you have multiple integrations.
Click on the line on your integration (we have SIE-file in our example).

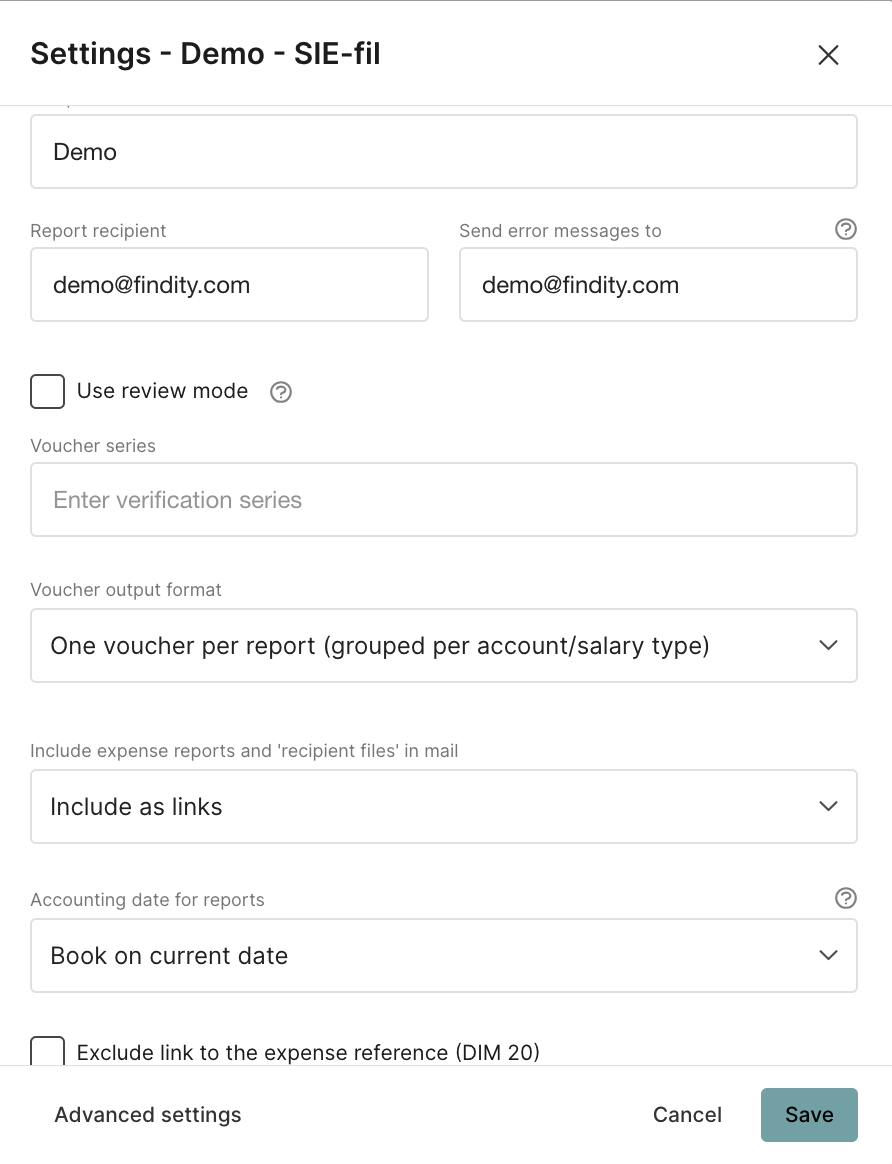
A new box will appear on your page. Fill in the information in the settings.
Read more about the setting Use review mode here:
Manage reports under ready to send

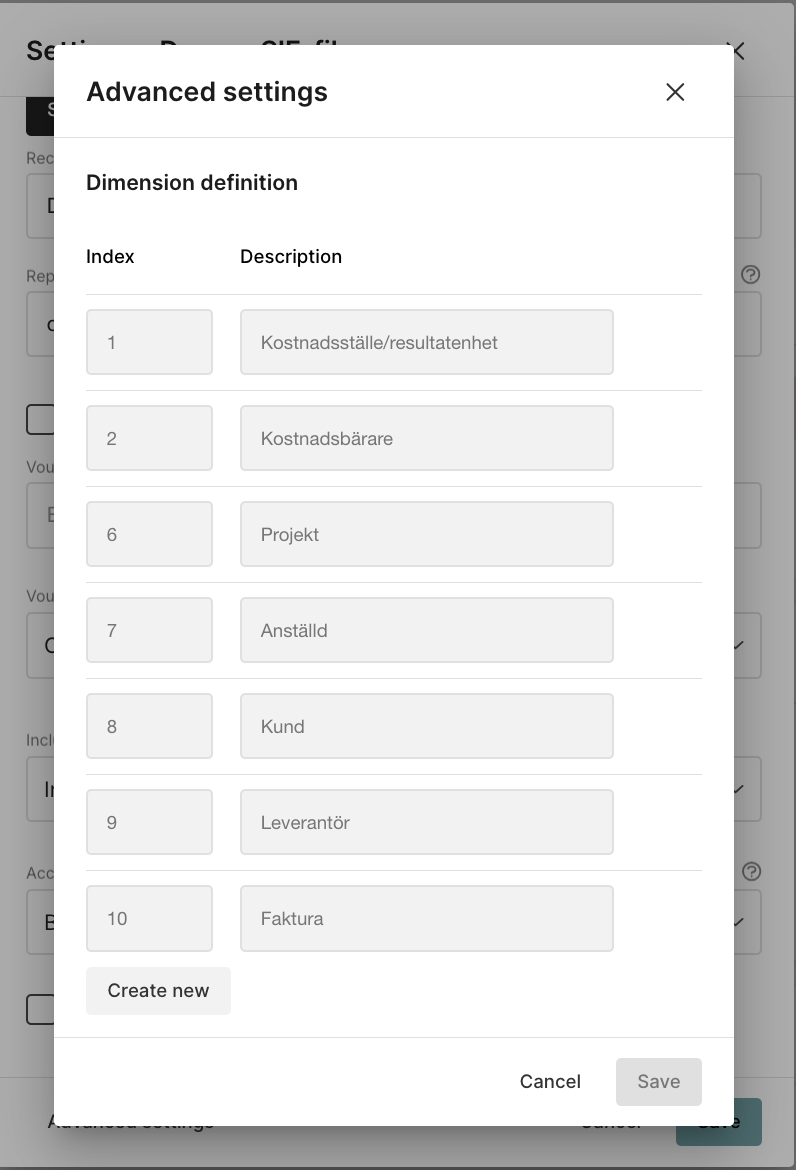
Advanced settings
On the integration SIE-file, there is a button called Advanced settings at the bottom of the page. This setting gives you the opportunity to create and add new index for dimensions.
(This setting may not be visible depending on the chosen integration).
If you want to read more about how to add new dimensions, click here Settings dimensions

Chart of accounts
Click on the line for Accounts

Choose to Create new in the box for Edit accounts.
You can add Number and Description manually and press Save changes. Your new account will now be saved on your organization.
The button Export will help you download a list of all uploaded accounts.
If you want to import accounts. Click on the button Import.
In this example, we choose to Import accounts.

You can add a BAS templates of accounts, or from Your own template.
Add from your own template
If you want to add from your own template. Click on the button Download template and add information in the downloaded file, save the file on your computer and press Import. Select the saved file on your computer. The accounts will now be uploaded to your organization.
In this example, we will choose to add templates from BAS 2017. Click on Import on the line for BAS 2017.

You need to confirm the addition by pressing Yes in the pop-up box on the page.

Save changes when you are done.
Tax account
The last setting on the chart of accounts is Tax account. Click on the line to add the tax account.

Remember to Save when you are done.

Payment methods
Click on the line for Payment methods.

Choose to Create new.
Add Account and Name, press Save when you are done.

Read more about the setting Payment methods and how to add Personal payment methods here Settings for payment methods
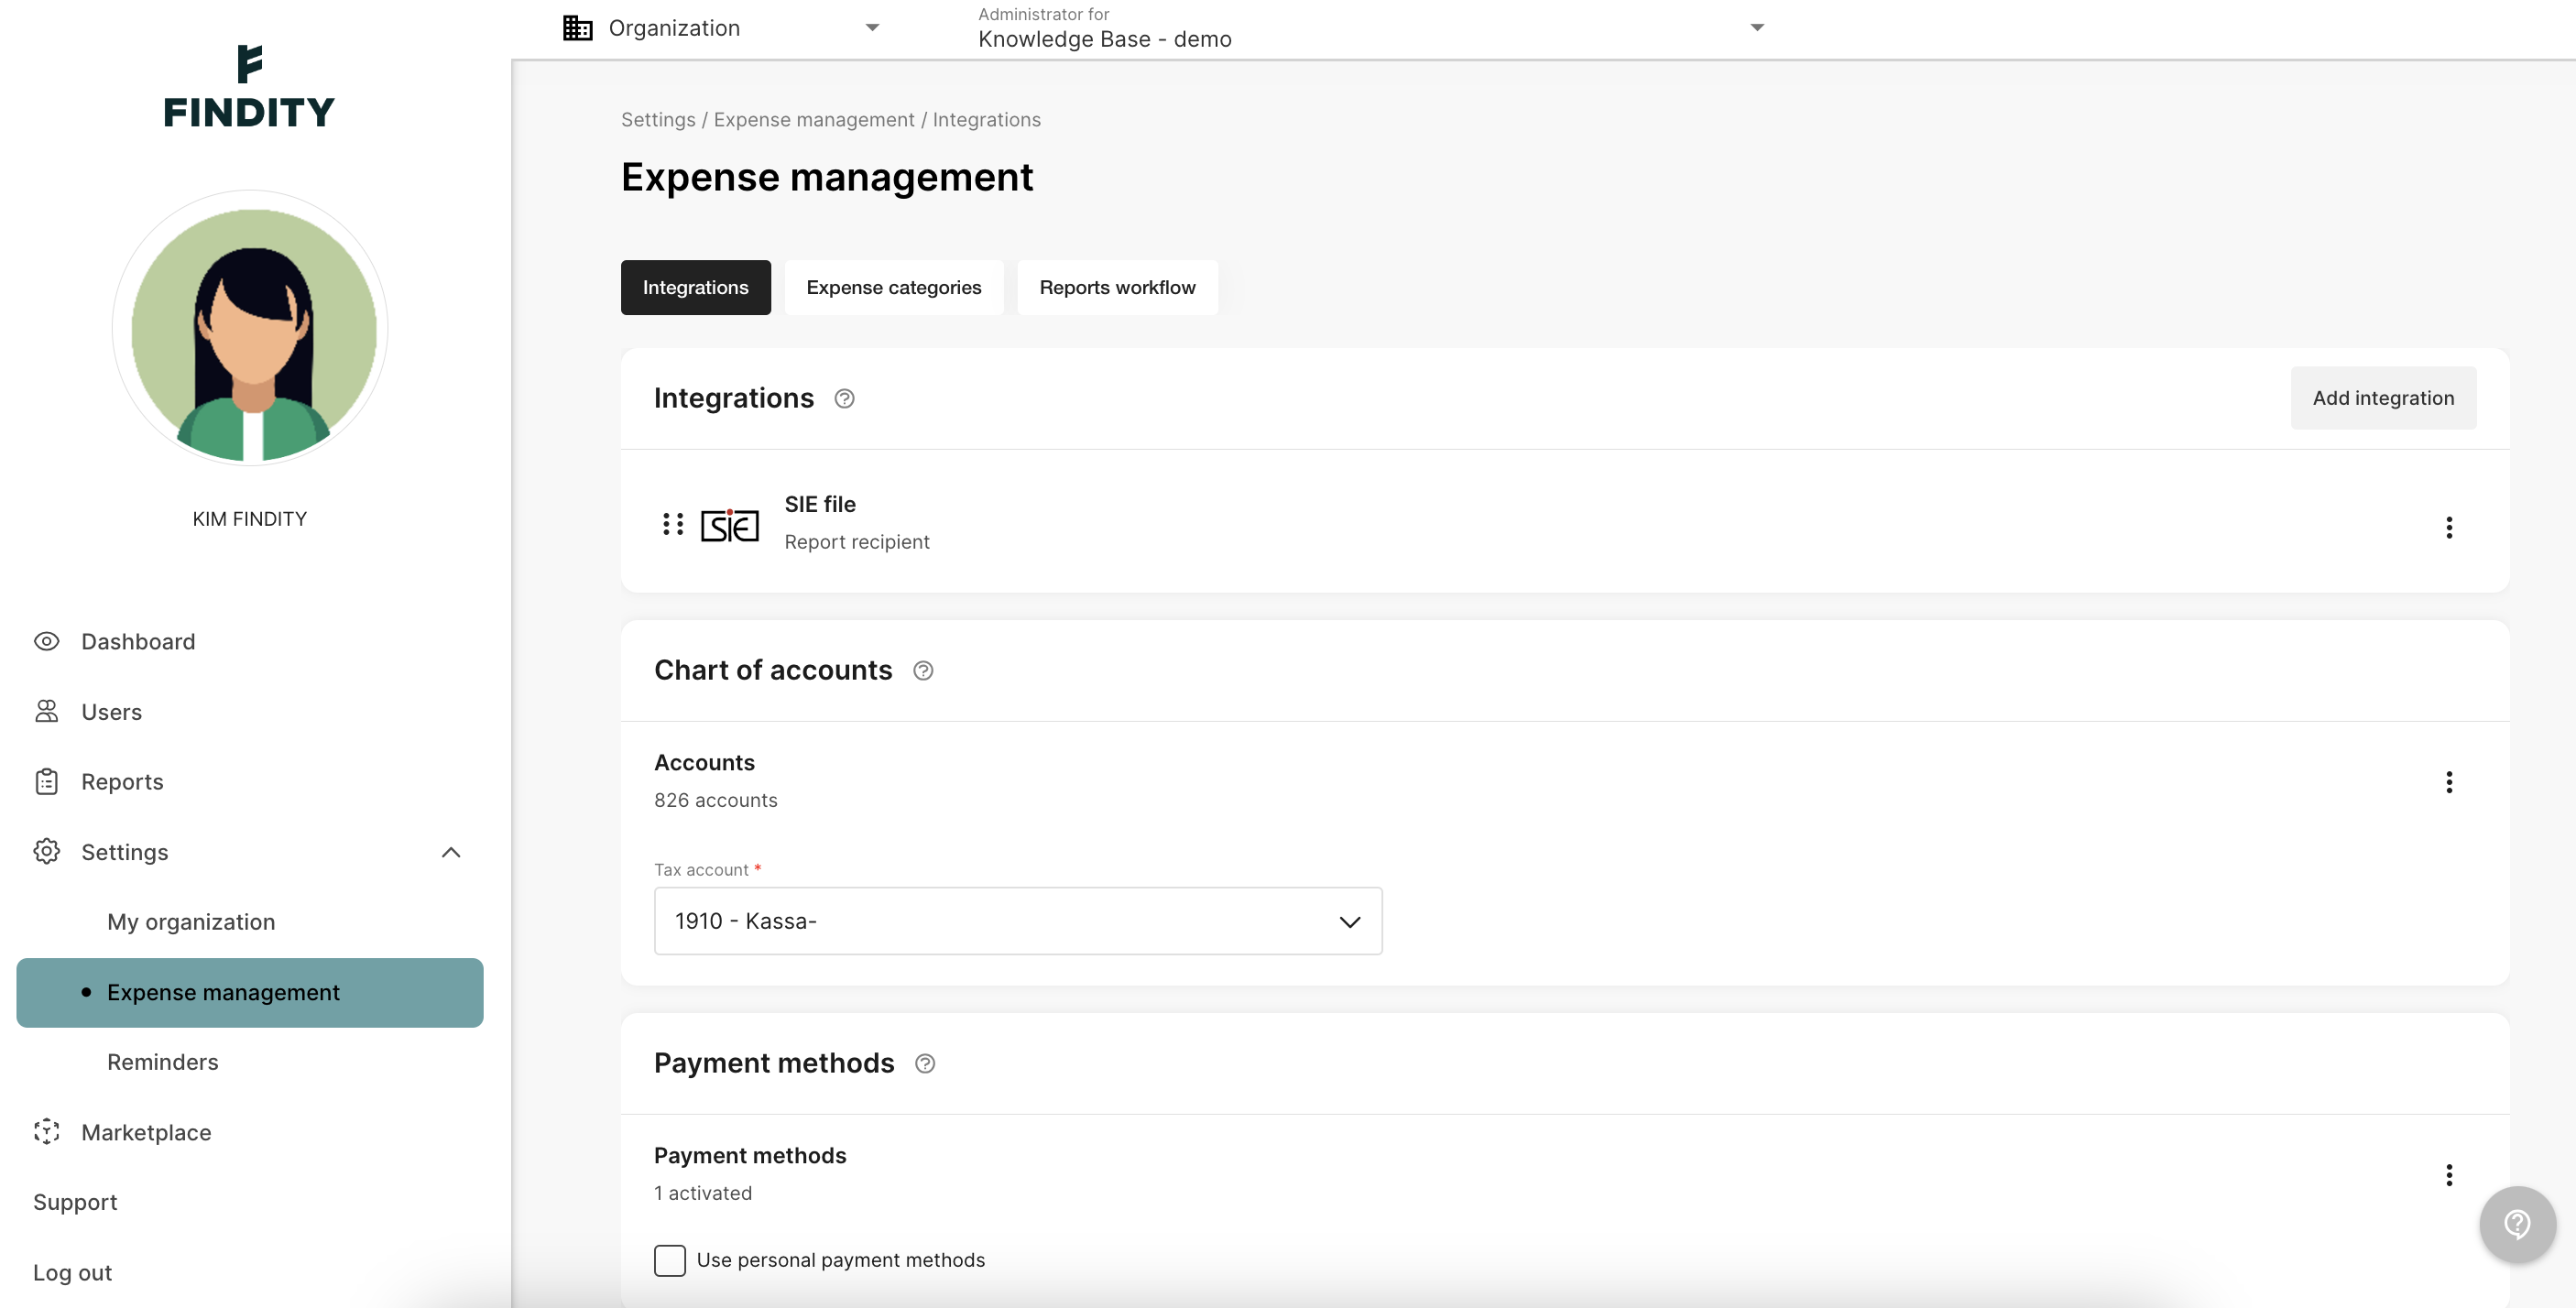
When you have gone through the steps in the tabs above, the settings will be done and all the red lines and warnings will be gone.

Go to this article to read more about how to get started with Findity